Learning Objectives
- Learn about data storage and transmission for cube sats and Earth environmental monitoring stations.
- Set up data logging with an Arduino and store it on a memory card.
- Set up a wireless data transmission system.
- Integrating everything into a single device (this may require extra time)
Prerequisite
For this workshop, you should have met one of the following prerequisites.
- ArduinoSat Workshop Part 1, or
- Experience developing with Arduinos including finding, uploading and using libraries, using and modifying code.
Introduction
We will build a system which begins to approach those in a real cube sat. You can build some or all of our ArduinoSat according to your preferences and willingness to engage in a challenge! Our full ArduinoSat prototype will have a motion-sensing unit, a luminosity sensor, data storage and wireless communication.
Initial Set-Up
- Start by connecting an Arduino to your laptop and test the connection by modifying the Blink file. If you have trouble, remember to check your board and port.
- Get a half-breadboard and some wires ready for use.
- If you still have the prototype you built for Workshop 1, you can build upon it.
Activity 1—Data Storage
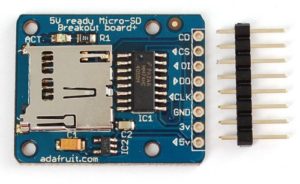
SD reader breakout board (credit: Adafruit)
Next, we will store data on a memory card. A real satellite would use storage device to hold data until it passes over a ground station. We will use the Adafruit card reader breakout board.
This card reader usually works, but sometimes it required extra patience. Please be gentle with the card and the reader!
- Add the memory breakout board to the breadboard. https://www.adafruit.com/product/254
- Connect it to the Arduino. (Read the Adafruit guide for instructions).
- Download the breakout board library.
- In the breakout board sketch, change the pin to 4.
- Next, add and connect the Inertial Measurement Unit as shown in Workshop Part I.
Activity 2—Add Luminosity Sensor
- Next, add and connect the Luminosity sensor as shown in Workshop Part I.
- Work the Luminosity sketch into the SD memory card sketch.
- Upload the combined sketch. Try to run it.
- Use an adaptor to read the card on your computer. Did you obtain any information?
Activity 3A—Data Transmission
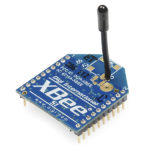
XBee
This is a challenging activity to complete. First we will transmit data among laptop computers with Bee radio transceivers. Then, we will transmit data wirelessly from our Arduino system to our laptop computer using a set of XBee transceivers. Although the systems used by nanosats are more powerful, our system will still contain conceptually similar components.
You will need both an XBee to connect to your laptop computer’s USB port as well as a second XBee to connect to the Arduino. For this activity, you will also need a stand-alone power source such as a battery pack or USB power pack.
Part 1: Laptop-to-Laptop Wireless Communications
This part is relatively easy.
- View Sparkfun Exploring XBees and XCTU
- Download X-CTU. More info.
- Connect a USB to your laptop computer’s USB port. You will need a USB to mini cable.
- Use X-CTU to communicate with each other via the X-CTU serial tool.
Part 2: Stand-alone Arduino (e.g. the “satellite”) with a laptop computer.
- Download and add the XBee libraries.
- Add an XBee to your half-breadboard.
- The use this wiring chart from ArduSat.
Additional Information:
- Sparkfun XBee pages.
- Using Arduino and Xbee Shields
Putting It All Together
This is the most challenging part of all. It might take longer than the workshop period, so you might have to finish this on your own. Wiring all of these components together on a single Arduino will not be simple, but is the sort of thing you would face for a real Arduino Sat.
- Next, add and connect the Inertial Measurement Unit as shown in Workshop Part I.
- Add the luminosity sensor.
- Add the Xbees.
- Include the memory card and sensor.
- Check your wiring
- Create a program with set-up and loop for all of the components and make sure that the wiring matches the program.
You can use this ArduinoSat file as a shortcut for beginning the coding for the integrated ArduinoSat.
Other Resources
- ArduSat video
- AstroSable ground station software
- I2C Communications Tutorial (SDA, SCL)
Troubleshooting
- Make sure the memory card is pushed in during writing and reading.
- Make sure you are viewing the correct file on your memory card.
- Make certain the power wire is connected to the correct voltage.
- Try a different baud rate for the serial monitor.
Disclaimer
Although SustainSat is not affiliated with ArduSat, it is recommended that readers consider their educational platforms and space services.